PIE and the associated PAMlets are installed using the Leonardo cdk-setup-config script available from the Leonardo Public Gitbucket.
There are a number of prerequisites necessary to be able support PIE. These include:
- An Apple MacBook with at least 16 GB of RAM.
- 25 Gb of free disk space per PIE.
- A Red Hat developers account. Accounts can be created from here.
- VirtualBox v6.0 or higher. VirtualBox can be downloaded from here.
- The Git client needs to be installed (may be default with OS)
- The Wget client needs to be installed.
Once you have confirmed the above and downloaded the cdk-setup-config script follow the instructions below. The script will download, install and configure cdk along with all the necessary PAM and UI components.
NOTE: the Mortgage Process PAMlet downloads approximately 4.8 Gb of necessary files
Step 1 - Download Leoanrdo's PIE cdk-config Script
Step 1.1
Move to the folder where you wish to install PIE installer (e.g. ~/PIE)
$ mkdir ~/pie$ cd ~/pie |
Step 1.2

Obtain a local copy of the cdk-setup-config script from Leonardo Public Gitbucket. If your machine does not have Git install, you can just download the "cdkget-setup-config.sh" script to your local machine.
pie $ git clone https://bitbucket.org/leonardo-consulting/lc-cdk-setup-config.gitCloning into 'cdk-setup-config'... remote:Counting objects: 48, done. remote:Compressing objects: 100% (48/48), done. remote:Total 48 (delta 20), reused 0 (delta 0)Unpacking objects: 100% (48/48), done. |
Step 2 - Execute the script and follow the prompt to choose your PAMlet
Step 2.1
Change into the directory for the cdk-setup-config script and Execute the script
pie $ cd lc-cdk-setup-configcdk-setup-config $ ./cdkget-setup-config.sh[EXECUTING]: mkdir -p ~/cdk390/bin[EXECUTING]: curl -w '%{http_code}' https://lss-cdk.s3-ap-southeast-2.amazonaws.com/cdk-3.9.0-1-minishift-darwin-amd64 -o ~/cdk390/bin/cdk-3.9.0-1.minishift-darwin-amd64 % Total % Received % Xferd Average Speed Time Time Time Current Dload Upload Total Spent Left Speed100 470M 100 470M 0 0 7230k 0 0:01:06 0:01:06 --:--:-- 4069k[EXECUTING]: cp /Users/admin/cdk390/bin/cdk-3.9.0-1-minishift-darwin-amd64 /Users/admin/cdk390/bin/minishift && chmod +x /Users/admin/cdk390/bin/minishift[EXECUTING]: export PATH=/Users/admin/cdk390/bin:/usr/local/bin:/usr/bin:/bin:/usr/sbin:/sbin:/Users/admin/bin:/Users/admin/bin[INFO] minishift binary is /Users/admin/cdk390/bin/minishift[EXECUTING]: export MINISHIFT_HOME=/Users/admin/cdk390/minishiftCurrent ~/.bashrc MINISHIFT_HOME is set as [/Users/admin/cdk390/minishift][EXECUTING]: /Users/admin/cdk390/bin/minishift setup-cdk --minishift-home /Users/admin/cdk390/minishiftSetting up CDK 3 on host using '/Users/admin/cdk390/minishift' as Minishift's home directoryCopying minishift-rhel7.iso to '/Users/admin/cdk390/minishift/cache/iso/minishift-rhel7.iso'Copying oc to '/Users/admin/cdk390/minishift/cache/oc/v3.11.104/darwin/oc'Creating configuration file '/Users/admin/cdk390/minishift/config/config.json'Creating marker file '/Users/admin/cdk390/minishift/cdk'Default add-ons anyuid, admin-user, xpaas, registry-route, che, htpasswd-identity-provider, eap-cd installedDefault add-ons anyuid, admin-user, xpaas enabledCDK 3 setup complete.[EXECUTING]: export MINISHIFT_HOME="/Users/admin/cdk390/minishift"[INFO] MINISHIFT_HOME=/Users/admin/cdk390/minishift |
Step 2.2
As the cdk-setup-config script runs, provide the necessary details as prompted:
- Entering "1" - Allocates 1 vcpu for the Minishift VM;
- Entering "2" - Allocates 2 vcpus for the Minishift VM (Recommended);
- Entering "4" - Allocates 4 vcpus for the Minishift VM.
[Please enter the required information for your minishift VM configuration]Minishift CPUs to be configured [1|2|4]: 2 |
Step 2.3
Based on the table in the Prerequisites section above, select the amount of RAM you want to allocate (10 GB is recommended when you want to edit a PAMlet in the DEV PIE/dev-sandbox).
Minishift RAM (GB) to be configured [6|8|10|12|16]: 10 |
Step 2.4
You will then be prompted to select the purpose for the PIE that you want to install:
- Entering "demo-ccd" will create the DEMO PIE environment for the Credit Card Dispute (CCD) DEMO;
- Entering "dev-sandbox" will create the DEV PIE environment without any PAMlets installed;
- Entering "pie-mortgage" will create the DEV PIE environment with the Mortgage Process PAMlet installed.
Your PIE and PAMlet to be configured [demo-ccd|dev-sandbox|pie-mortgage]: pie-mortgage |
Confirm that you wish to install the Mortgage PAMlet.
Install or Remove pie-mortgage [install|remove|scaledown]: install |
Step 2.5
Enter your Red Hat Developer's credentials. If you don't have one, click here.
Your redhat developer username [E.g.: bob.brown@abc.com]: jon.snow@nights-watch.orgYour redhat developer password: |
Step 2.6
Enter "yes" if you want to launch the OpenShift Console in your browser when the installation is finished; Enter "no" if you want to remain in the "Terminal" window.
Start minishift cdk post configuration [yes|no]: yes |
The script will then ask to review and confirm the attributes before you proceed.....
Hello "jon.snow@nights-watch.org". You've requested for a minishift VM of the following attributes: VM vCPUs: 2 VM RAM Size[GB]: 10 VM Hypervisor Type: virtualbox VM Minishift Addons: pie-mortgage VM Minishift Addon Task: install VM Minishift BaseEnv: dev-sandbox VM Minishift start: yesType 'Y|y' to proceed, 'R|r' to re-enter details and 'C|c' to cancel: y |
Step 2.7
The script will then ask to review and confirm the attributes before you proceed.....
[EXCECUTING] ~/cdk390/bin/minishift profile set pie-mortgage-profile-2vcpu-10gb......[EXECUTING] oc login https://192.168.99.121:8443 -u admin -p password -n pie-mortgage Login successful. You have access to the following projects and can switch between them with 'oc project <projectname>': default dev-sandbox kube-dns kube-proxy kube-public kube-system myproject openshift openshift-apiserver openshift-controller-manager openshift-core-operators openshift-infra openshift-node openshift-service-cert-signer openshift-web-console * pie-mortgage Using project "pie-mortgage".[INFO] Starting minishift consoleOpening the OpenShift Web console in the default browser... |
It takes approximately 10 minutes on a MacBook with a 2.2 GHz Intel iCore7 processor and 16 GB of RAM for the script to complete the installation and launch the OpenShift Web Console. The last few lines of a successful installation are shown above.
Step 3 - Verify
Step 3.1
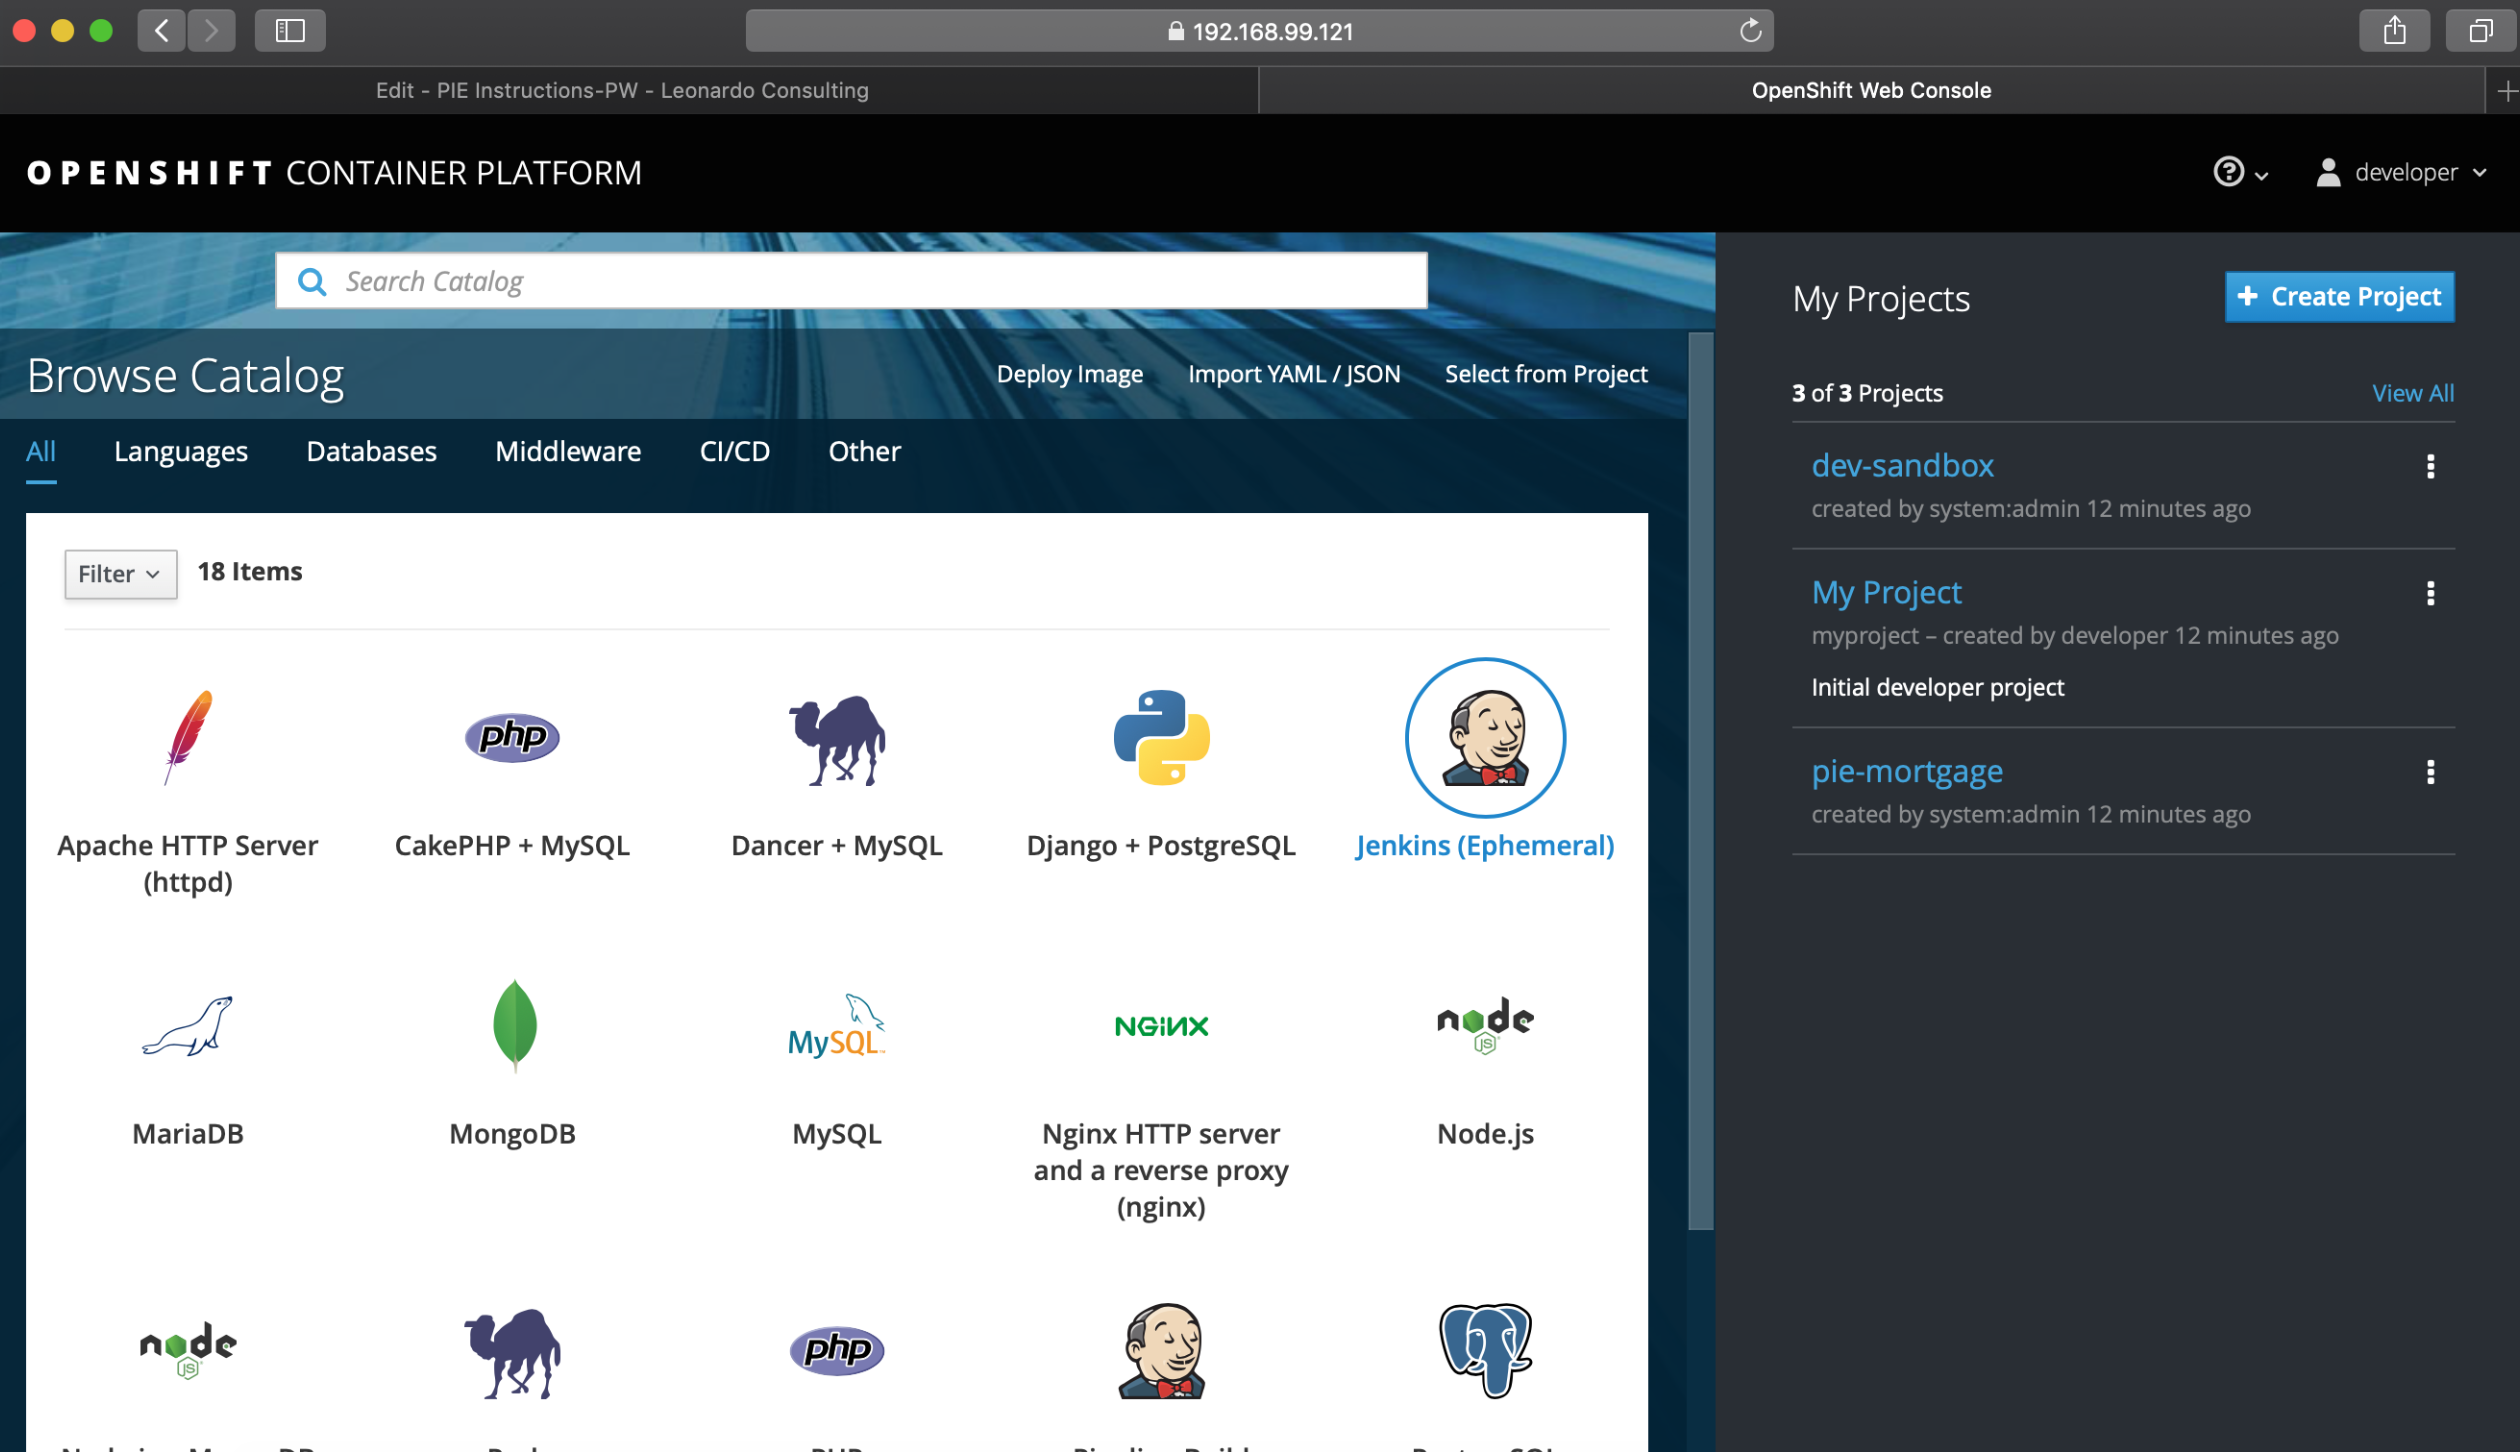
Based on the attributes selected (in the case above, installing the Mortgage Process PAMlet on the Dev Sandbox), the OpenShift Web Console will look similar to the screenshot below:
(NOTE: The URL of your OpenShift Console will be http://your-VirtualBox-IPaddress/console/. In the case of the screenshots below it is http://192.168.99.122/console/ ).
This has installed 3 projects:
- the base DEV environment (called dev-sandbox)
- an area for developers to create their own project called "My Project" (this is installed by default by OpenShift)
- the Mortgage Process PAMlet (called pie-mortgage)
Step 3.2
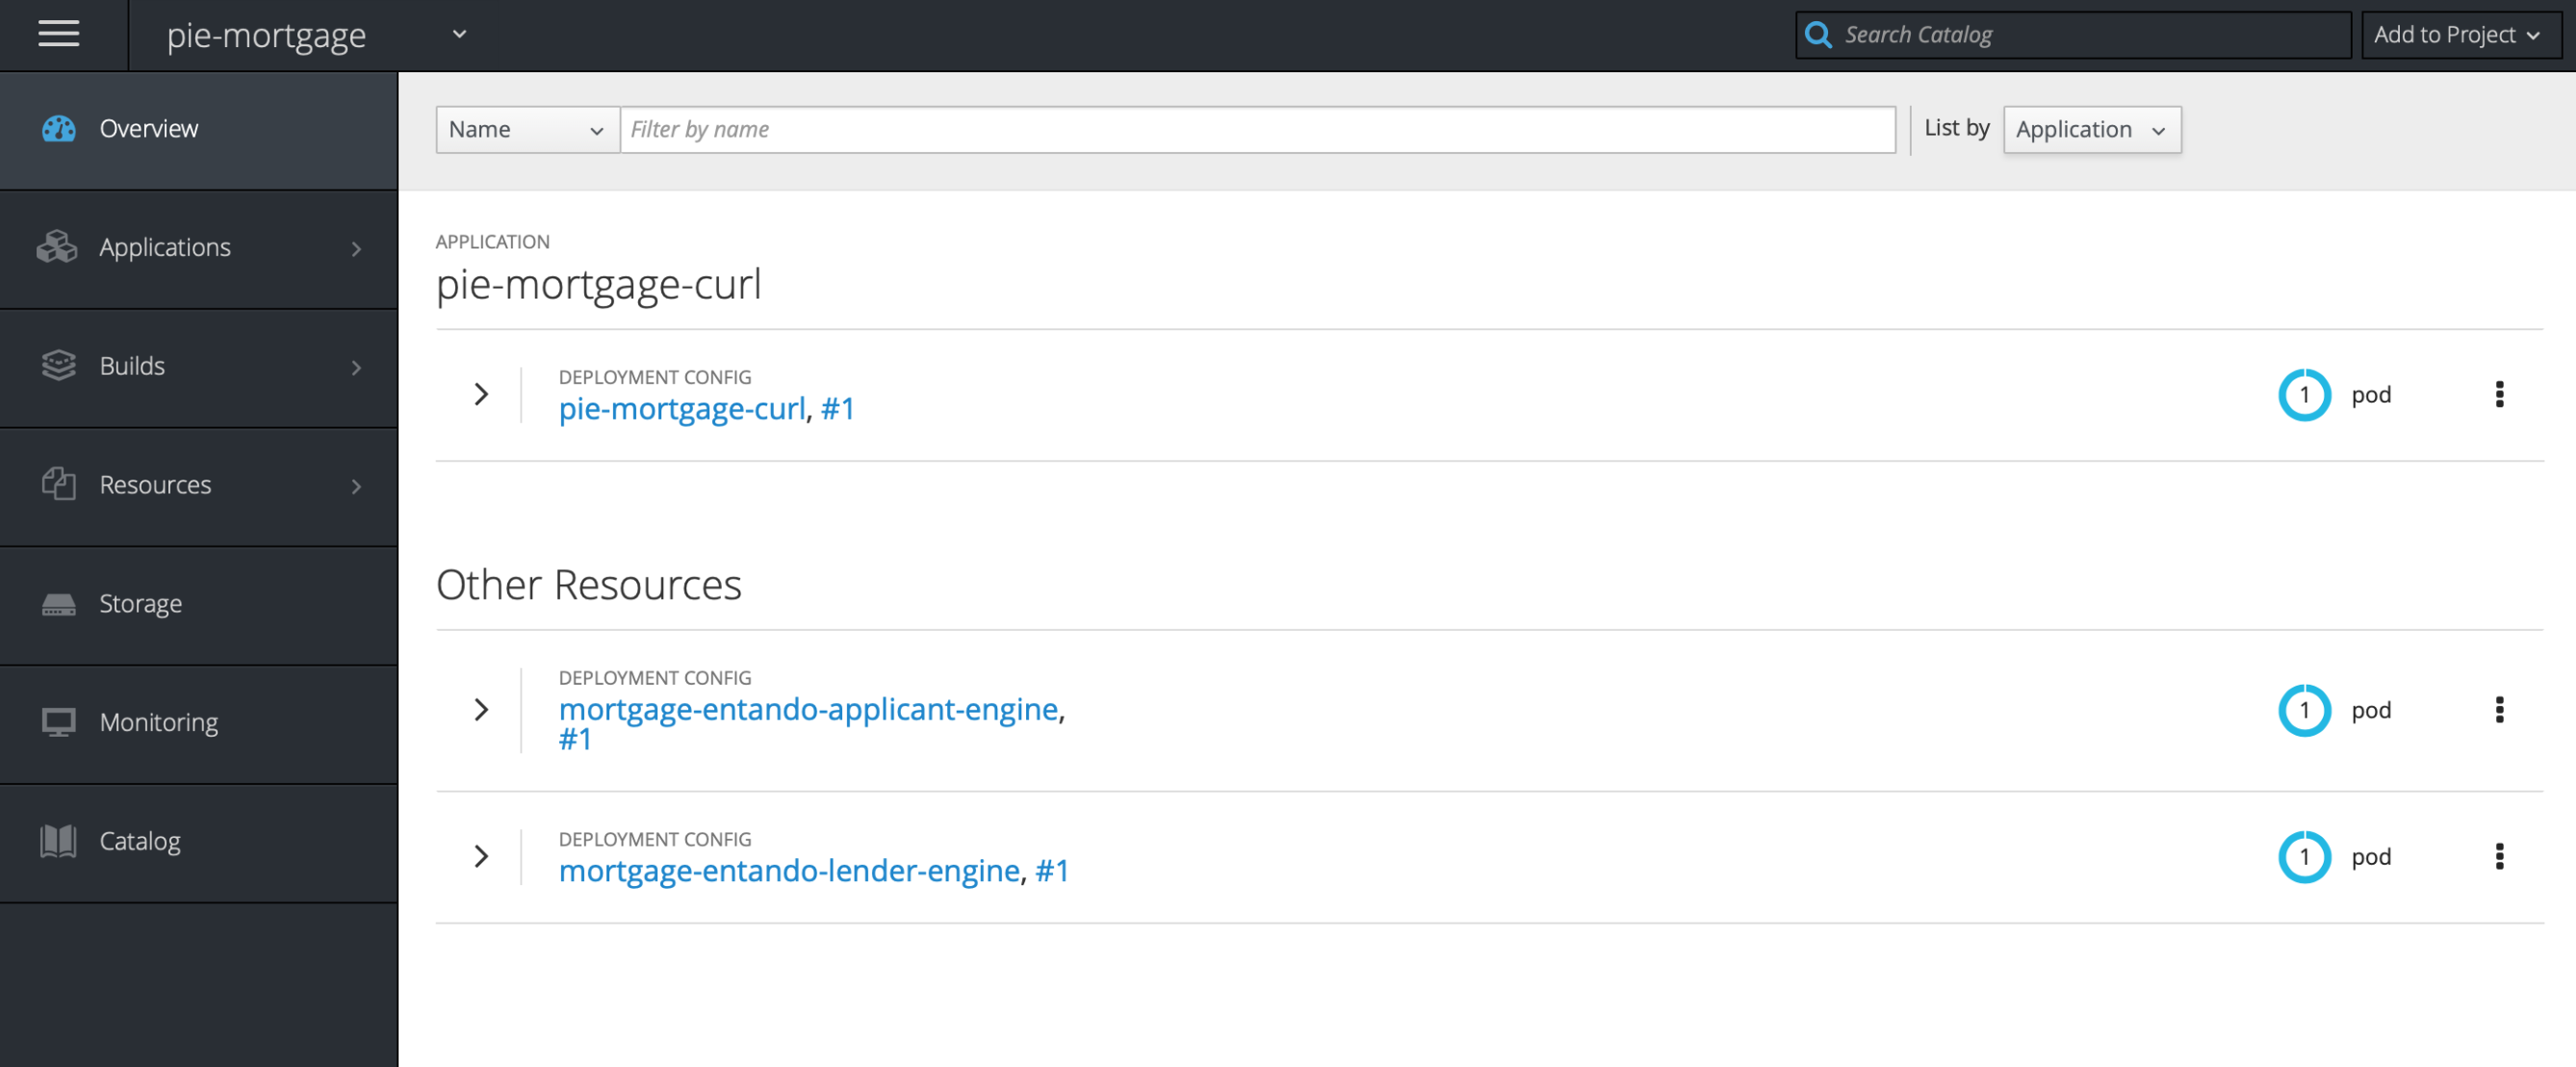
Depending on your machine, the Pods on CDK may take 5 to 10 minutes to be fully accessible.
Selecting the "pie-mortgage" project will present you with the applications inside the project:
Step 3.3
On the left-had side of the OpenShift Portal Console, if you move your mouse over the Applications >" button, a pop-up menu will appear as per the screenshot below:
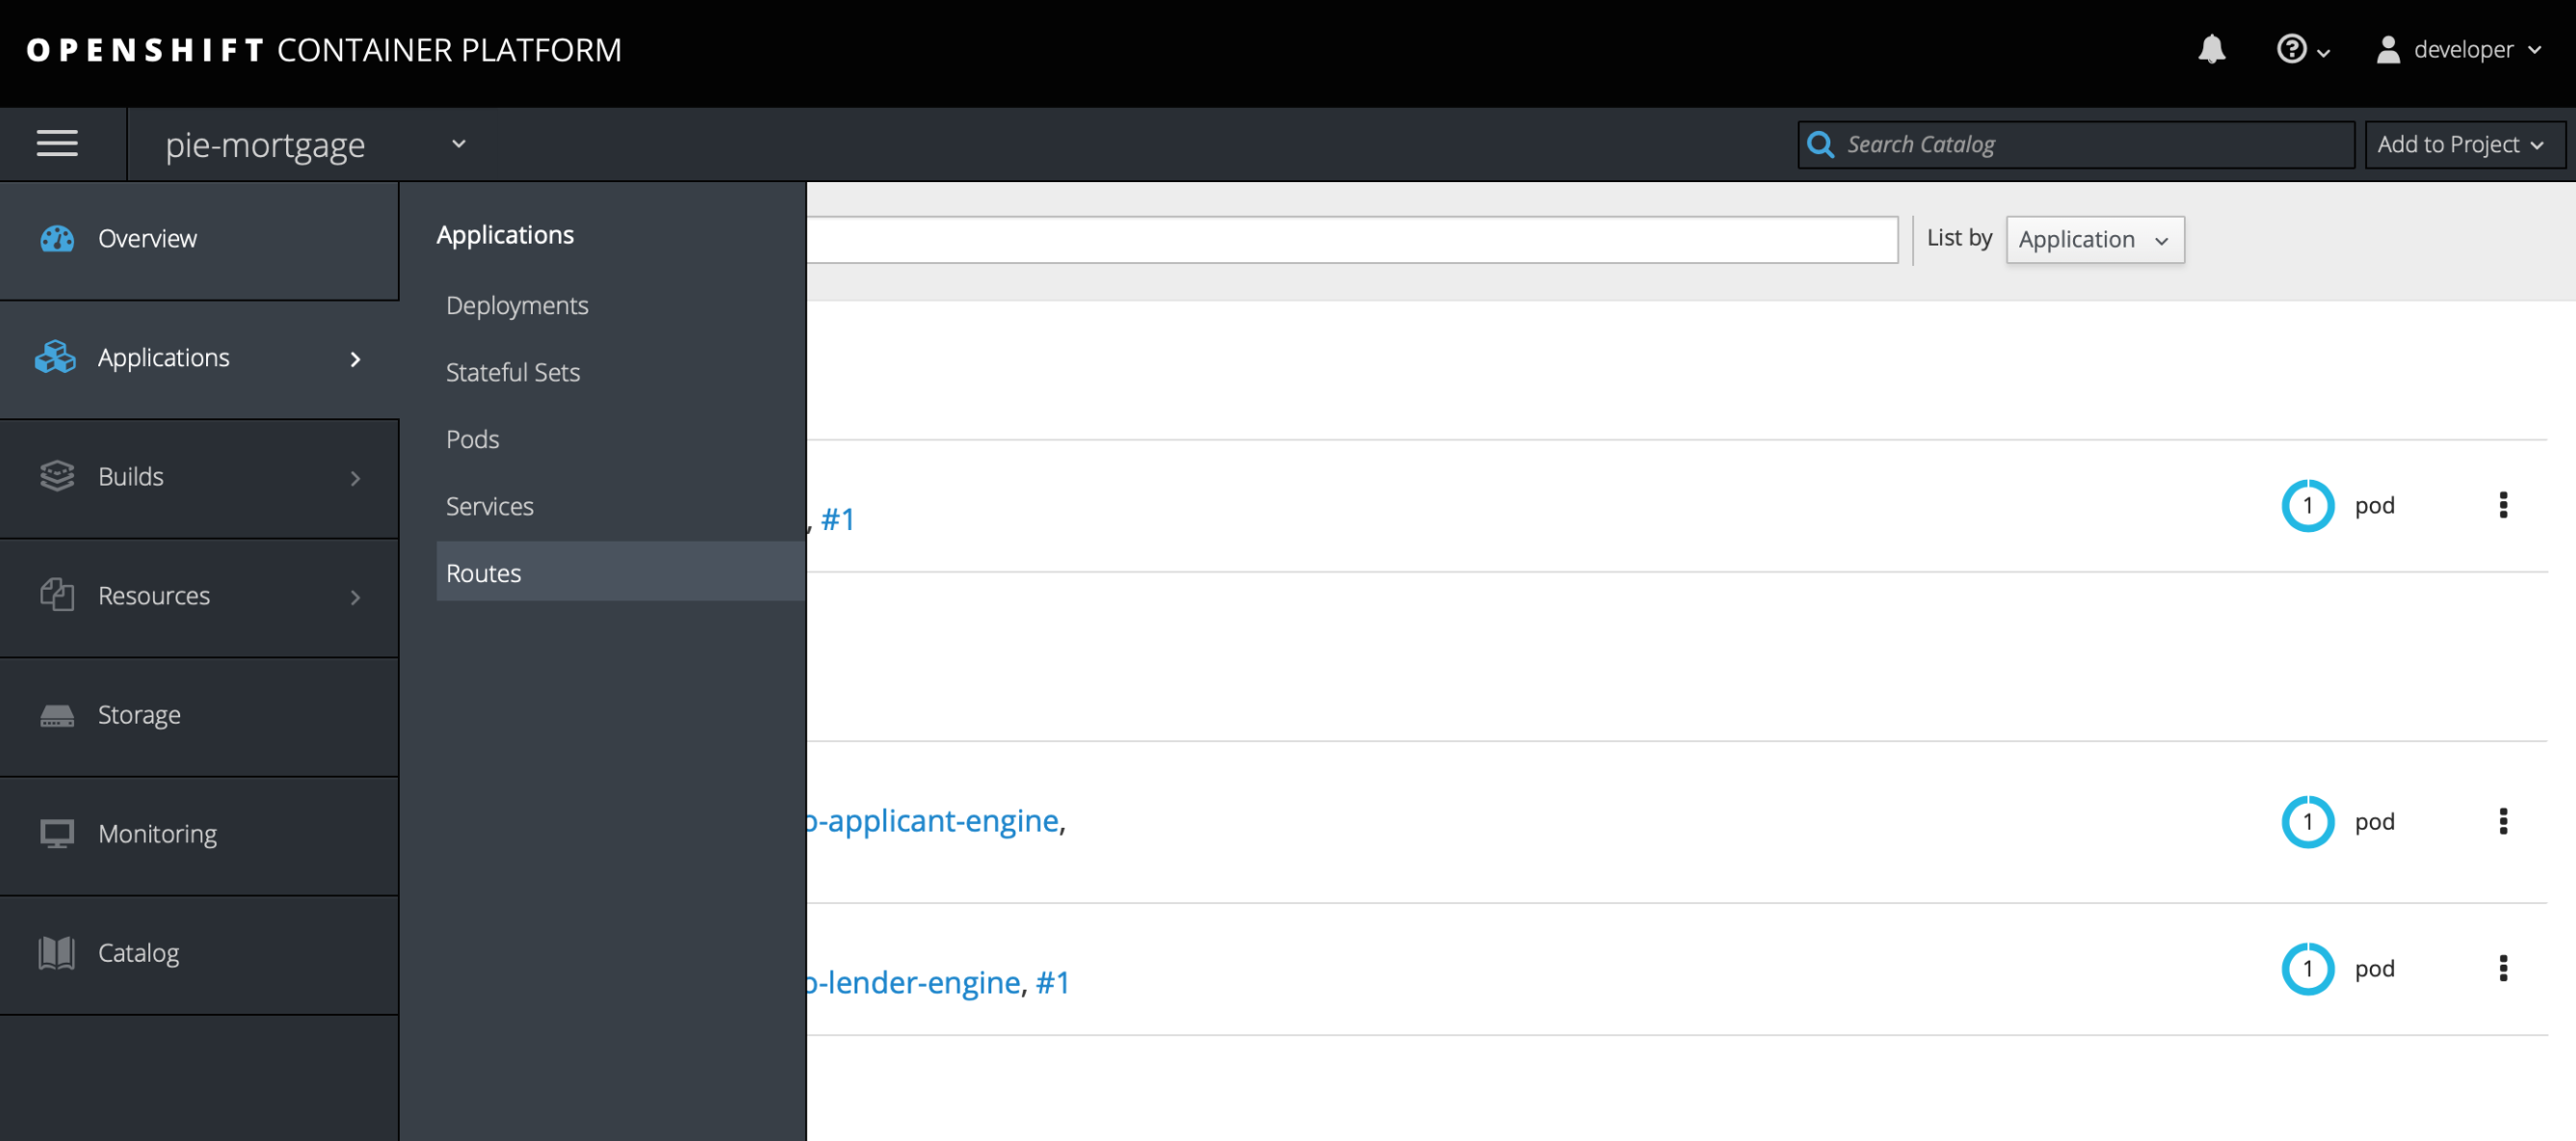
Step 3.4
Move your mouse down the pop-up menu and select "Routes". The following screen will appear:
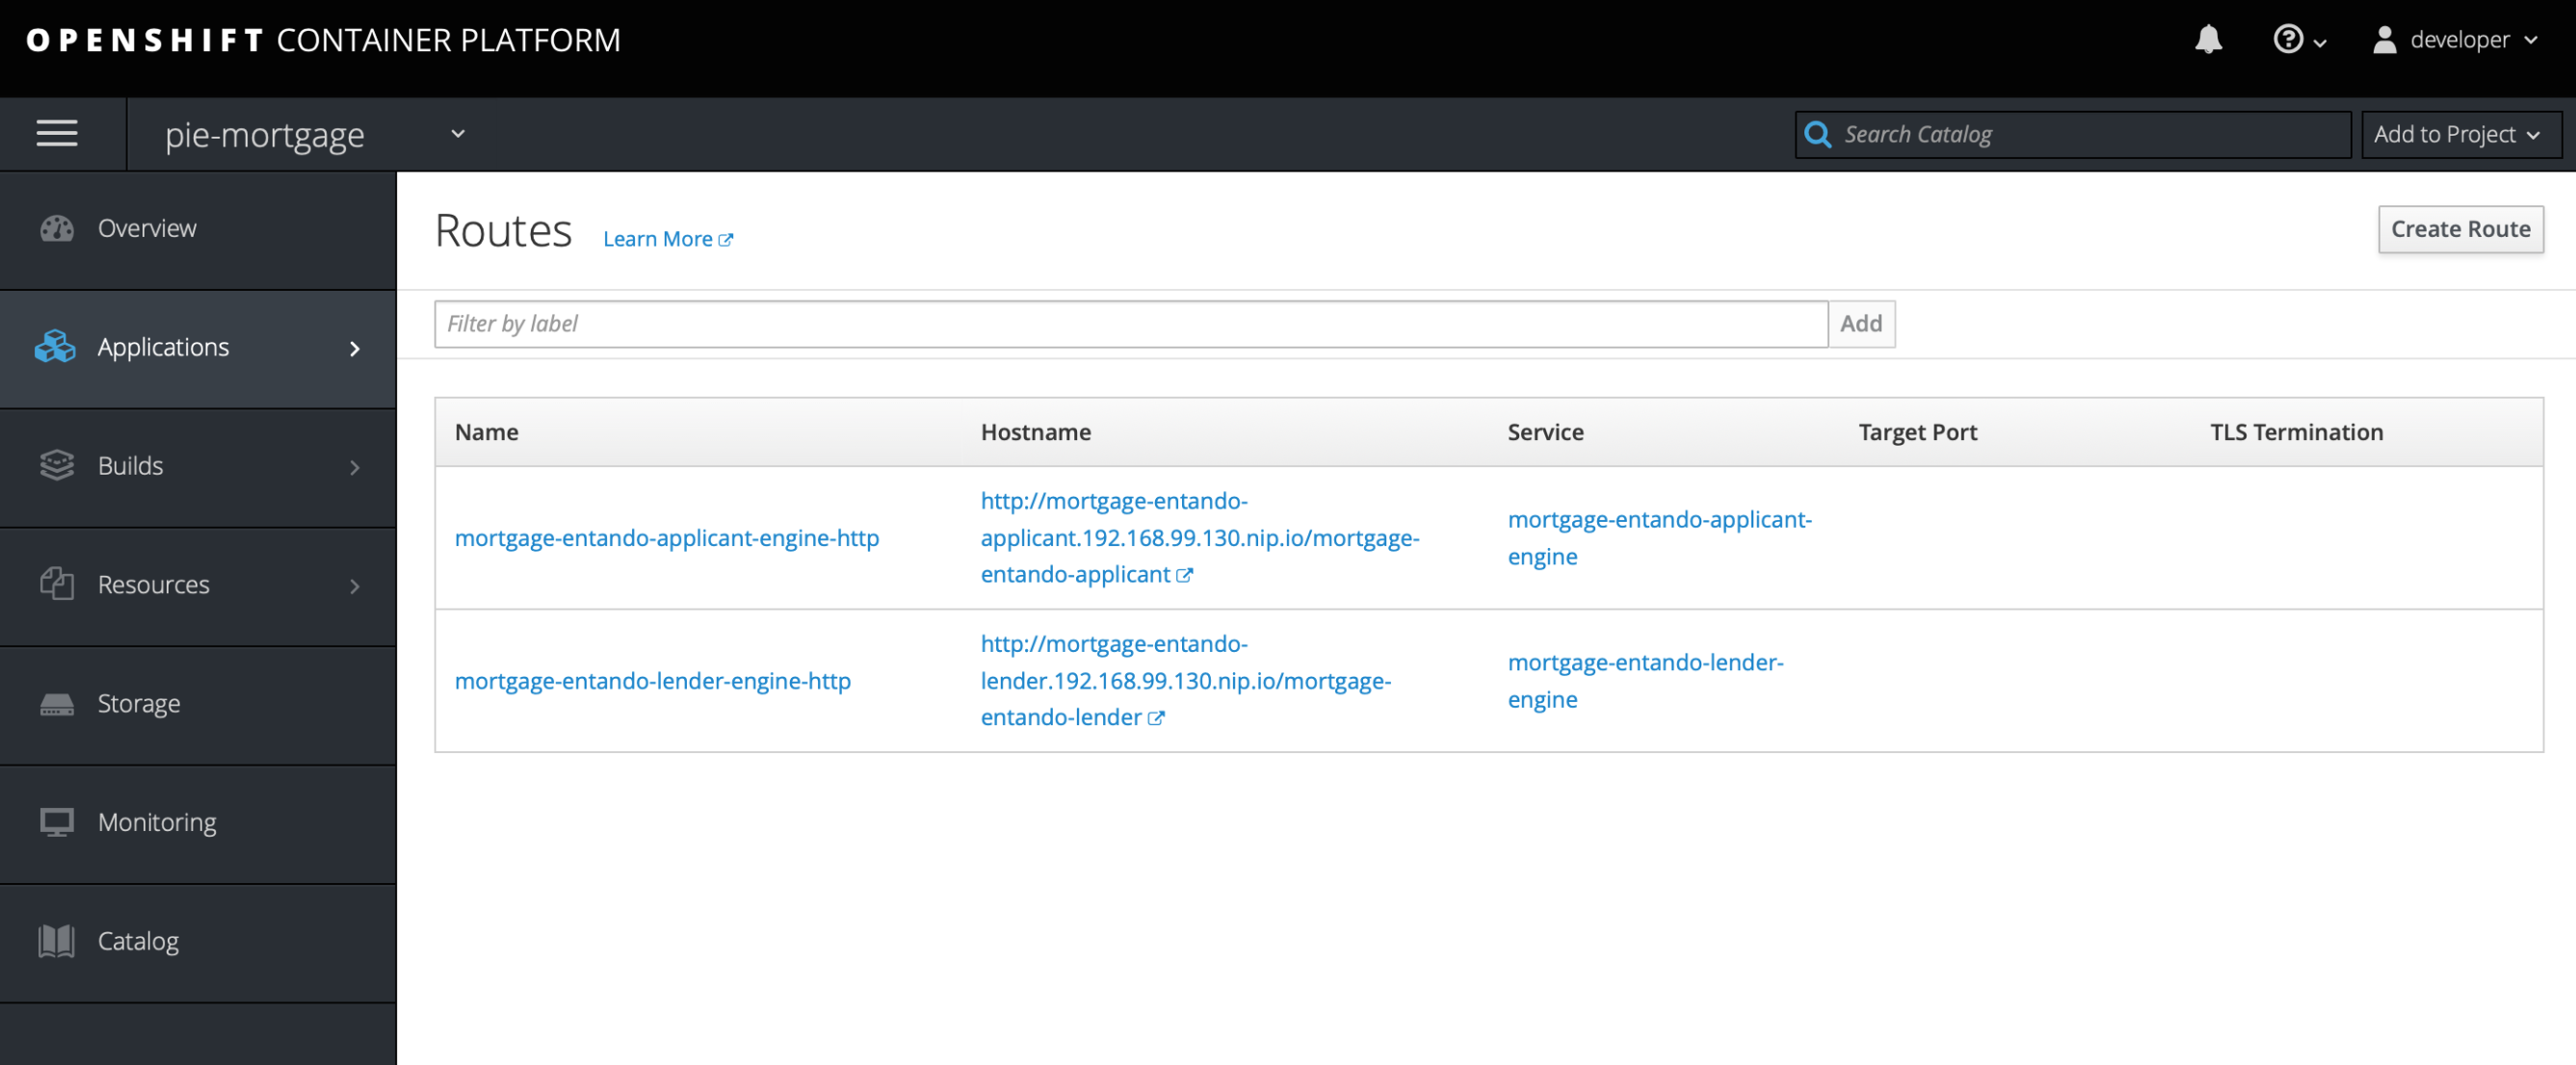
Step 3.5
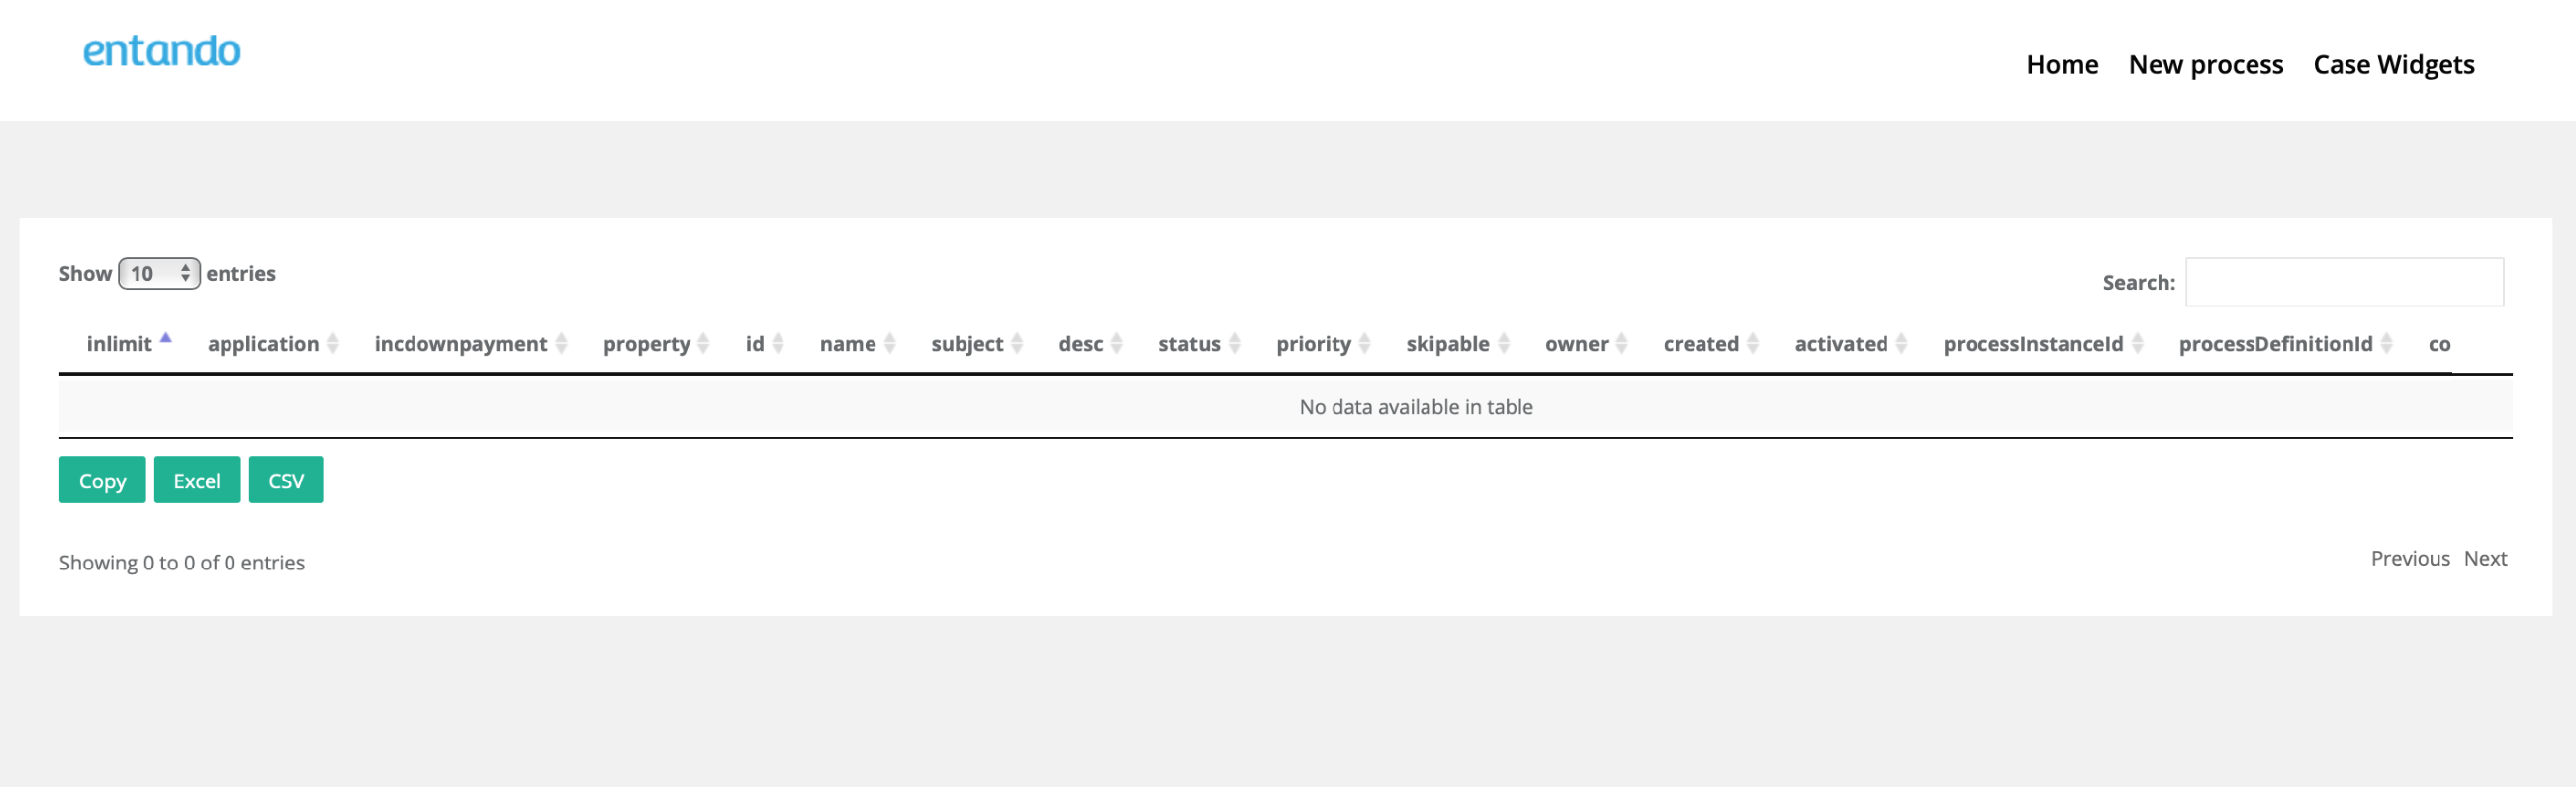
Using the Routes screen above, clicking on this link in the Hostname column - http://mortgage-entando-applicant.192.168.99.130.nip.io/mortgage-entando-applicant - will take you to the Customer UI for the Mortgage PAMlet:

Step 3.6
Using the Routes screen above, clicking on this link in the Hostname column - http://mortgage-entando-lender.192.168.99.130.nip.io/mortgage-entando-lender - will take you to the Customer UI for the Mortgage PAMlet: